> ## Documentation Index
> Fetch the complete documentation index at: https://docs.kicks.dev/llms.txt
> Use this file to discover all available pages before exploring further.
# Get started
> Automatically manage your Shopify products and pricing with KicksDB
KicksDB integrates directly with your Shopify store to automate product management, keeping your storefront in sync with live market data from StockX and GOAT.
## What's included
Automatically create and publish products on your Shopify storefront using
data sourced from StockX or GOAT.
Keep prices up to date with a 15-minute refresh cycle, pulling live data
from StockX or GOAT.
Define dynamic margin rules using KicksDB's node editor to control your
pricing strategy at scale.
## Prerequisites
Before connecting your store, make sure you have:
* A KicksDB account with access to the [dashboard](https://kicks.dev/dashboard)
* Admin access to your [Shopify store](https://shopify.com/admin)
* Access to the [Shopify Developer Dashboard](https://dev.shopify.com/dashboard/) to create a custom app
## Connect your Shopify store
### Step 1 — Create a custom app in Shopify
1. Go to your [Shopify Developer Dashboard](https://dev.shopify.com/dashboard/) and click **Create App**.
2. Enter any app name (e.g. `kicksdb`) and confirm.
3. In the **App URL** field, enter:
```
https://via.kicks.dev/api/shopify/initialize
```
4. Under **Scopes**, add the following permissions:
```
write_inventory,read_inventory,read_locations,read_products,write_products
```
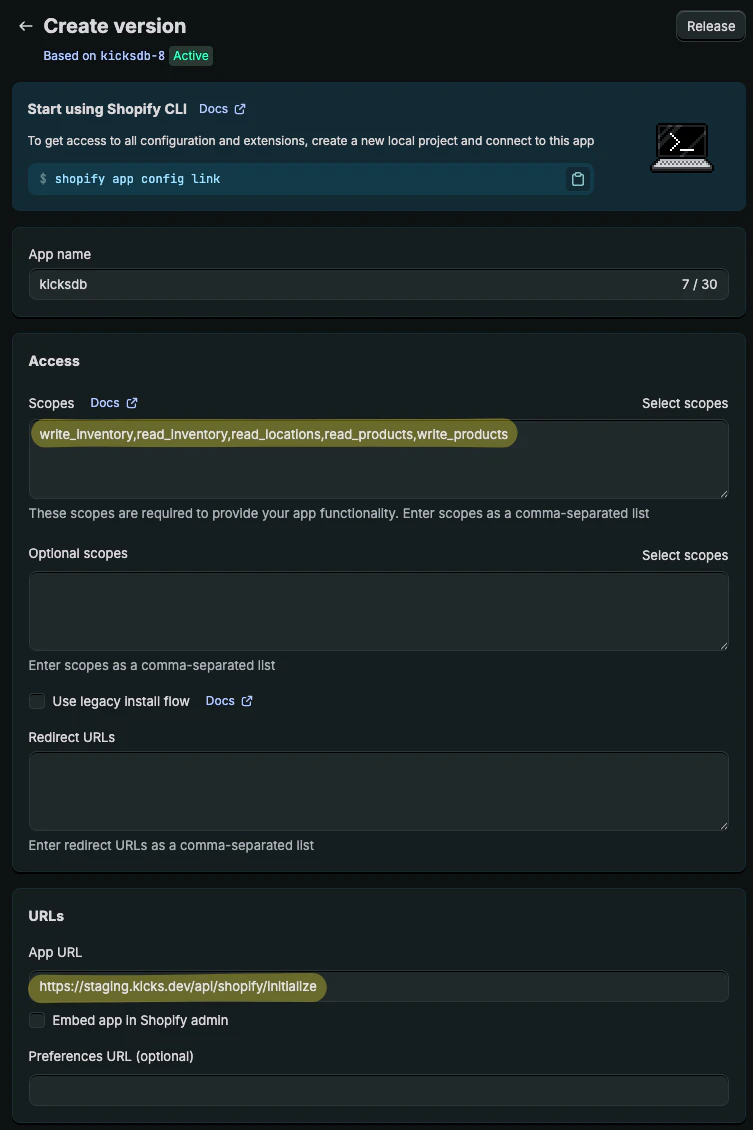 5. Click **Release** to finalize the app.
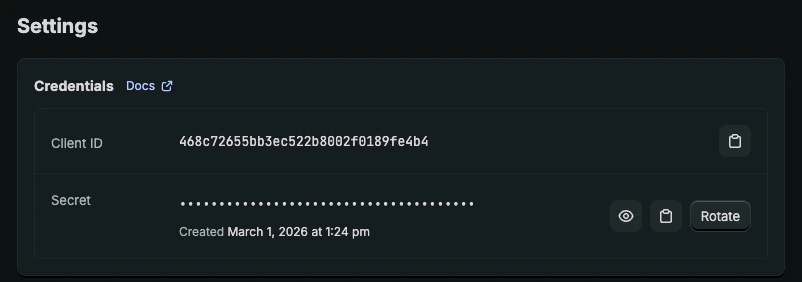
6. Navigate to **Settings** — your **Client ID** and **Secret** will be listed there.
5. Click **Release** to finalize the app.
6. Navigate to **Settings** — your **Client ID** and **Secret** will be listed there.
 ### Step 2 — Connect the store in KicksDB
1. Open your [KicksDB dashboard](https://kicks.dev/dashboard) and go to the **Stores** page.
2. Click **Connect store** and fill in the form.
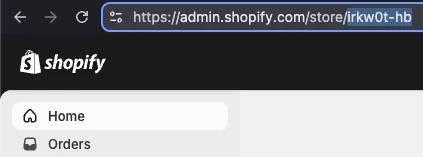
3. For the **Shop name**, go to your [Shopify Admin](https://shopify.com/admin) and copy the name from the URL:
### Step 2 — Connect the store in KicksDB
1. Open your [KicksDB dashboard](https://kicks.dev/dashboard) and go to the **Stores** page.
2. Click **Connect store** and fill in the form.
3. For the **Shop name**, go to your [Shopify Admin](https://shopify.com/admin) and copy the name from the URL:
 4. Paste the **Client ID** and **Secret** from the previous step.
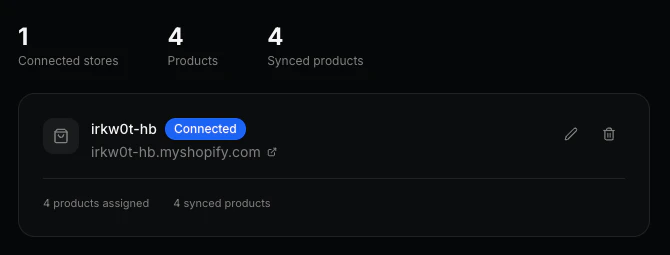
5. Click **Save**, then click **Install** from KicksDB.
You'll be redirected back to KicksDB once the installation is complete.
4. Paste the **Client ID** and **Secret** from the previous step.
5. Click **Save**, then click **Install** from KicksDB.
You'll be redirected back to KicksDB once the installation is complete.
 Always install the app from KicksDB — not from the Shopify Developer
Dashboard. This ensures your credentials and configuration are saved correctly
before the OAuth flow begins.
Always install the app from KicksDB — not from the Shopify Developer
Dashboard. This ensures your credentials and configuration are saved correctly
before the OAuth flow begins.